breakinglight11: (Default)
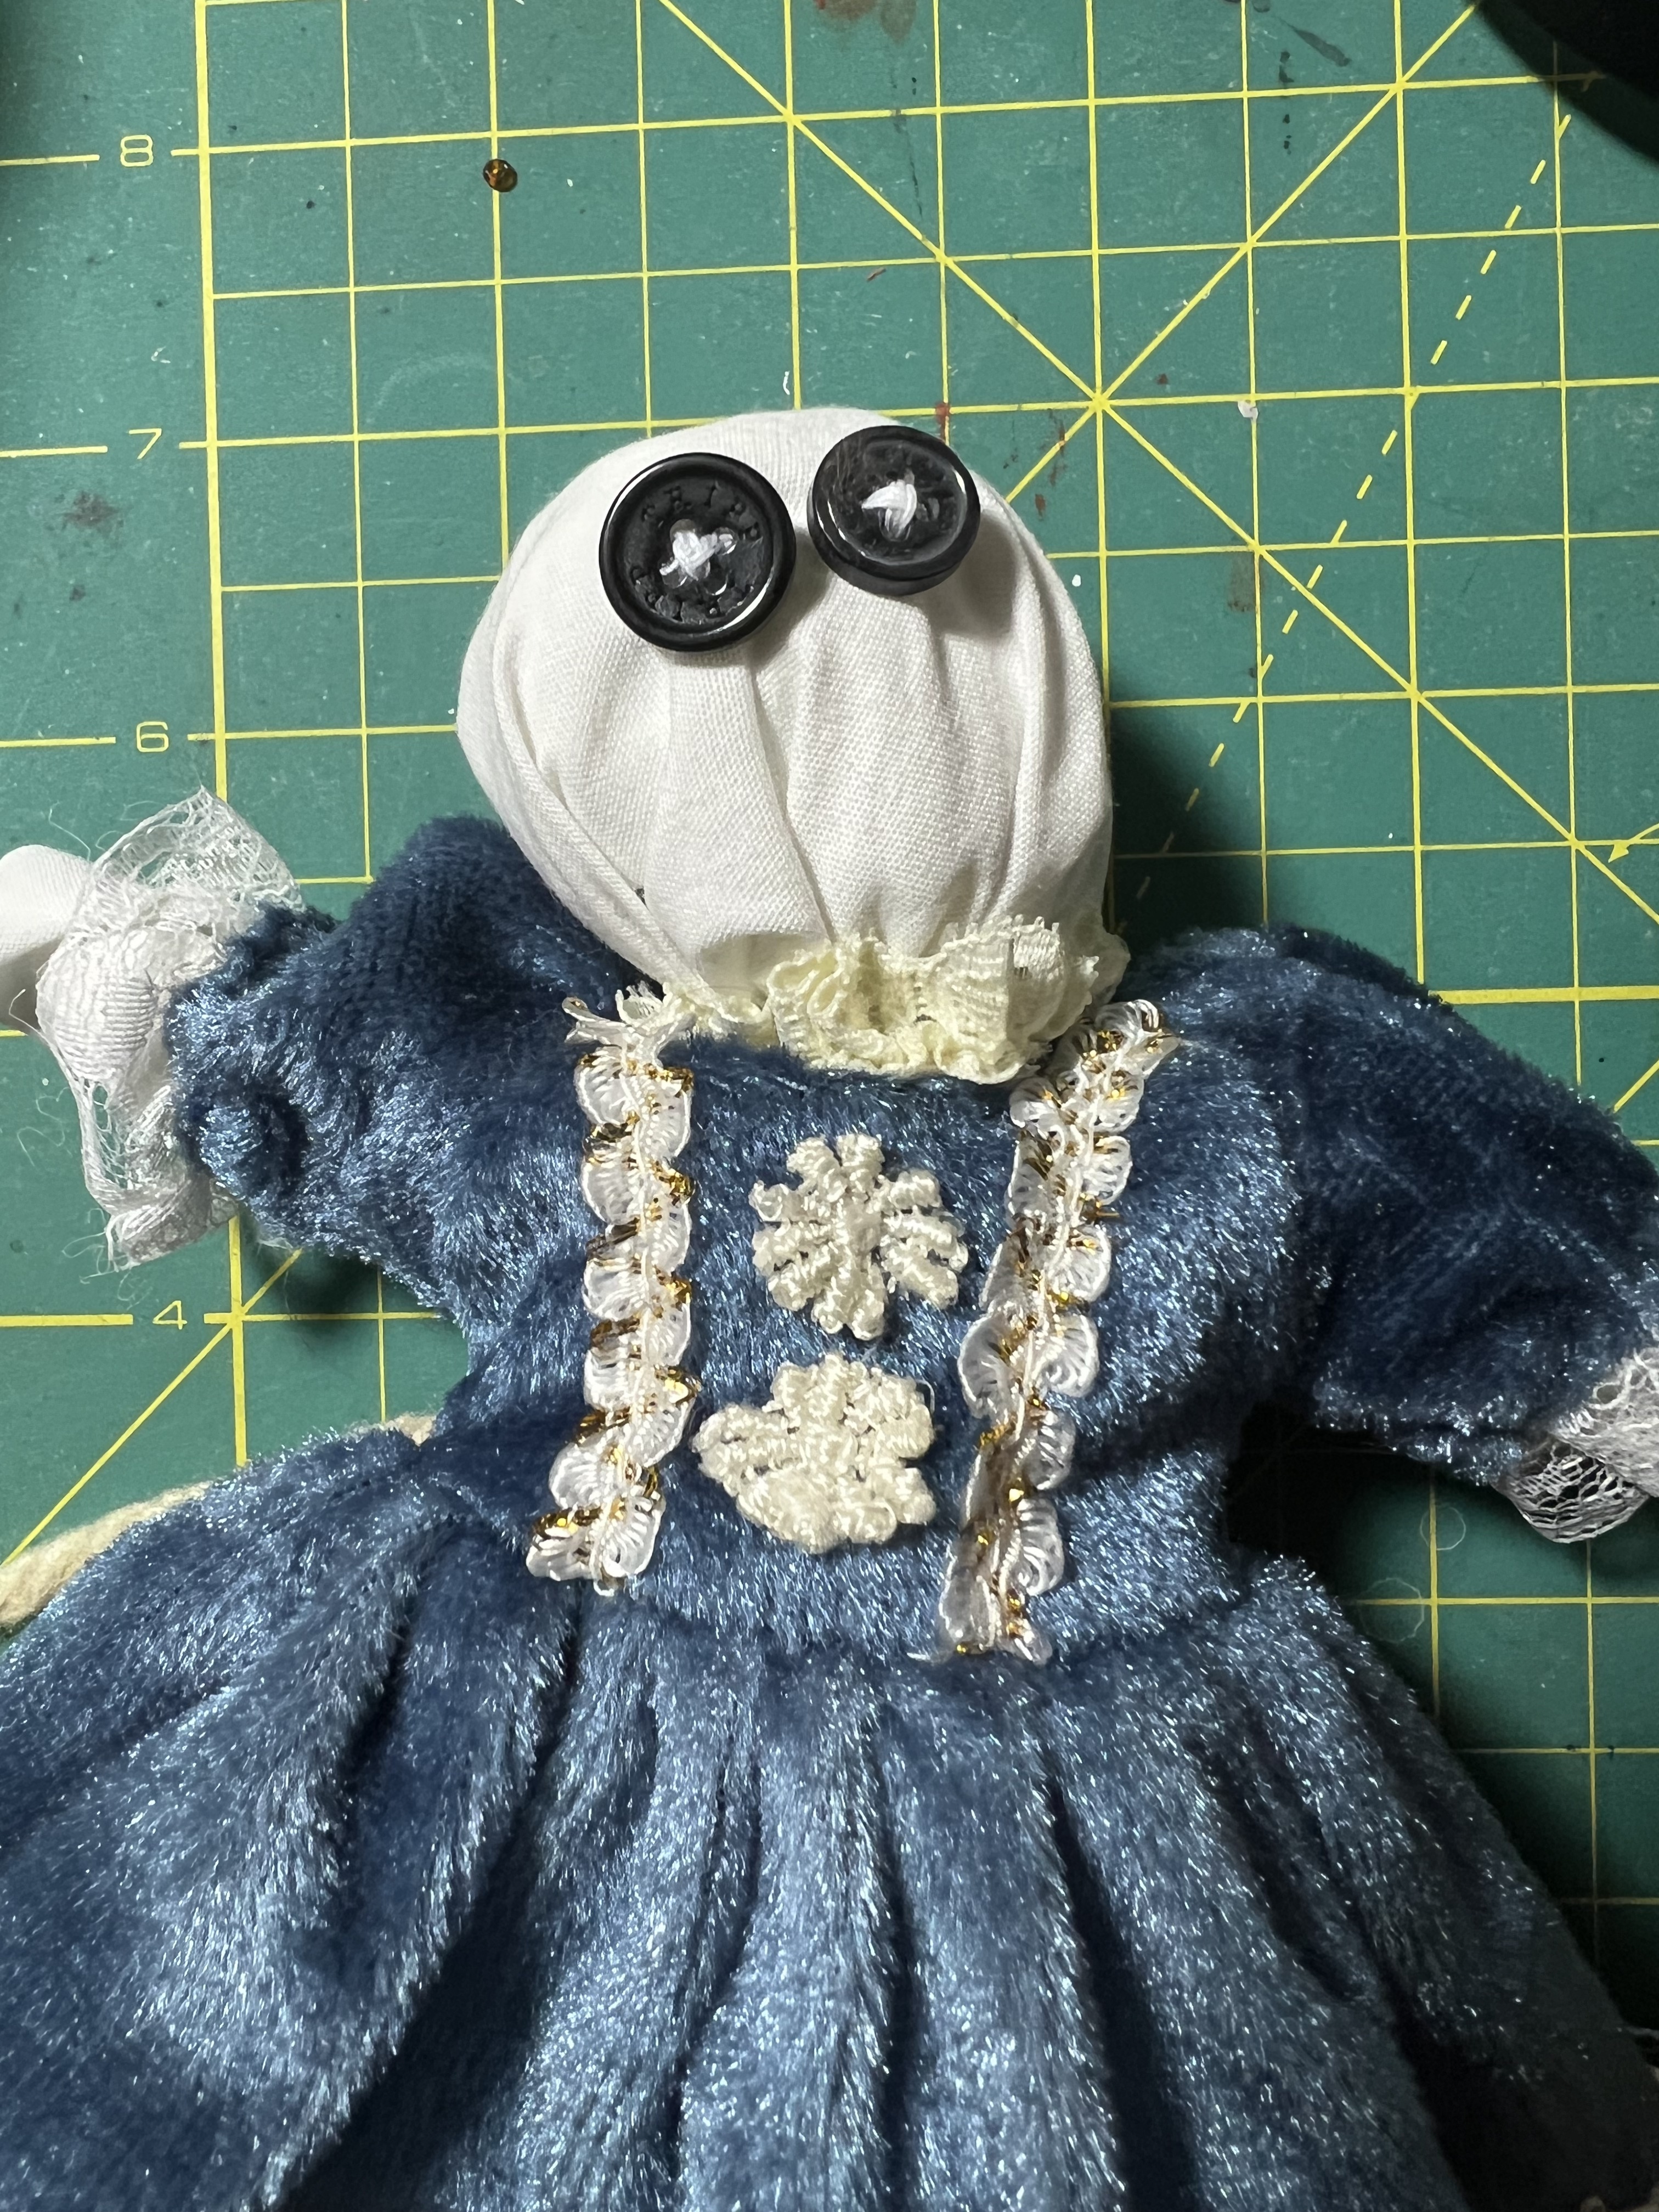
Ragdolly for the new Mrs. Hawking play now has hair. I cut lengths of this thick acrylic yarn, folded them in half, and sewed them in rows down the back of her head. Then I took a handful of yarns and draped them across the top of her forehead to create a hairline. I sewed those down with a slightly off center stitch to look like a left hand "part". I considered styling it in some way, but I kinda like it the way it is.


All that remains is to embroider on a little smiling mouth. Probably going to do it in pink, which hopefully will keep it from looking too Jokerish. With the button eyes there is definite creepy potential to end up looking like the Other Mother from Coraline.
breakinglight11: (Default)
We need a ragdoll as a prop for the new Mrs. Hawking play, In the Bones, and I was having trouble finding one in a thrift store. I bought one that I thought might work, but it was actually a mostly porcelain ball-jointed doll that was too fragile for my purposes. So I took the doll's dress and bloomers and decided to make the body myself.

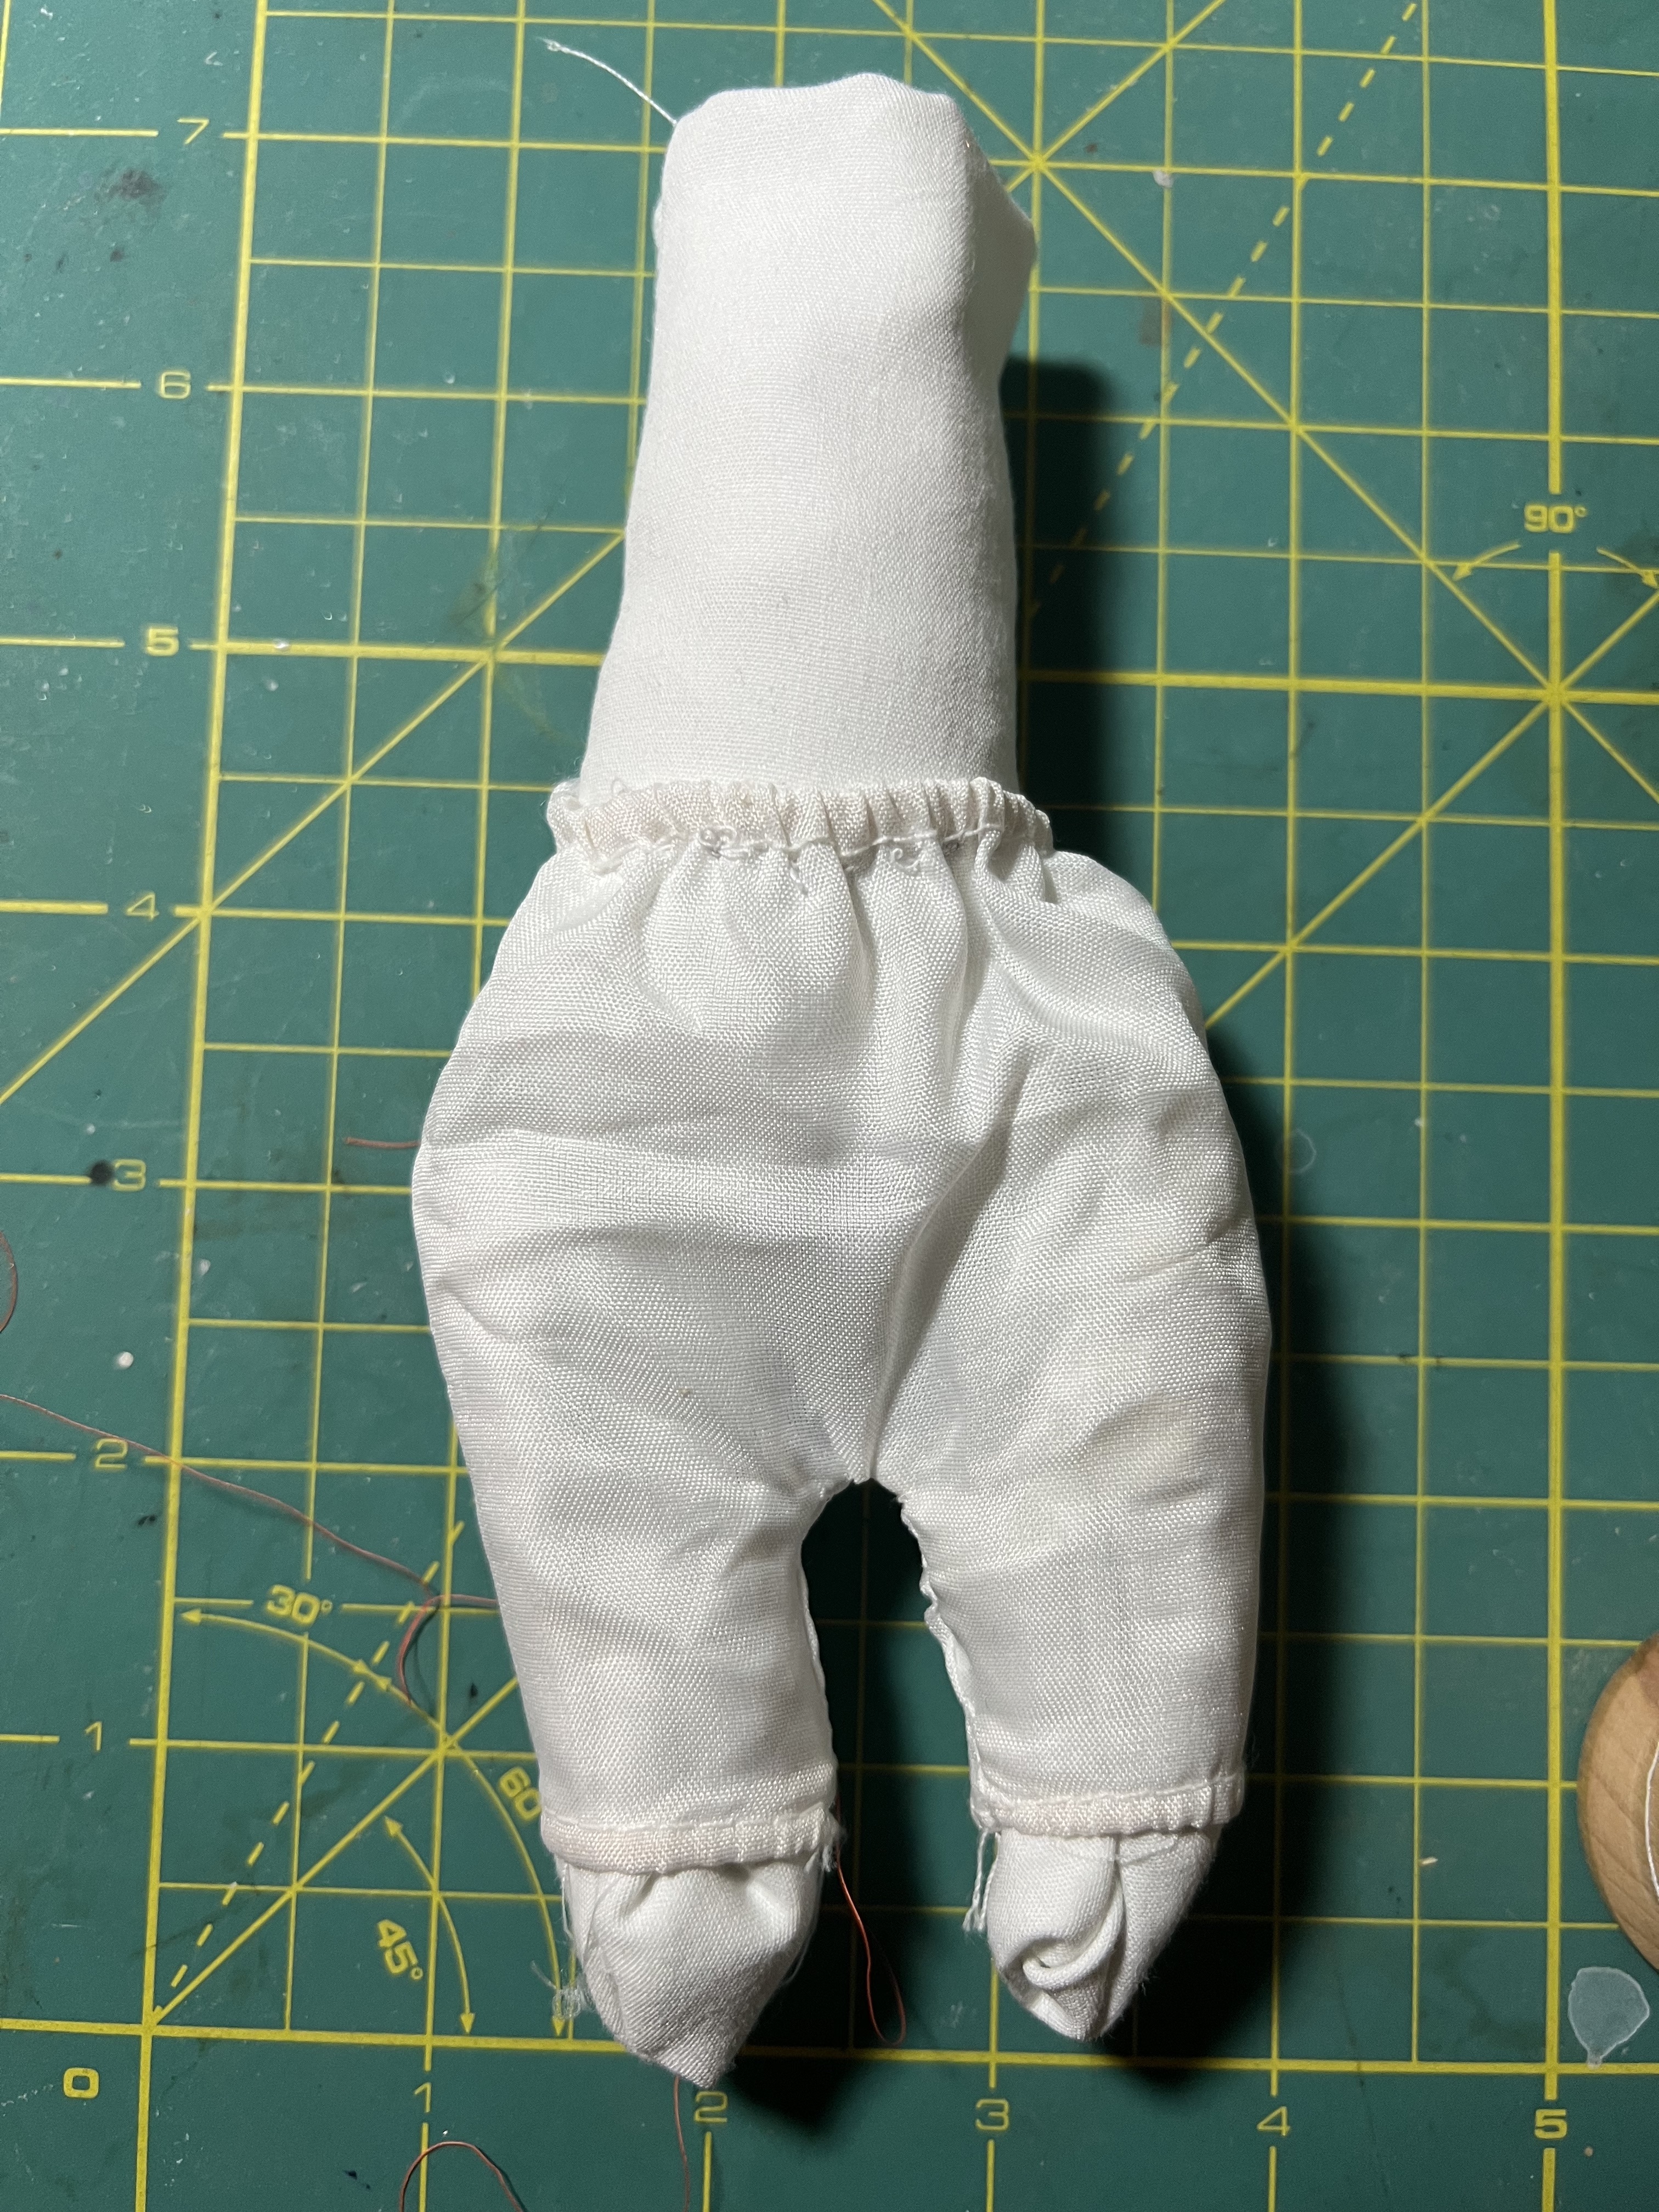
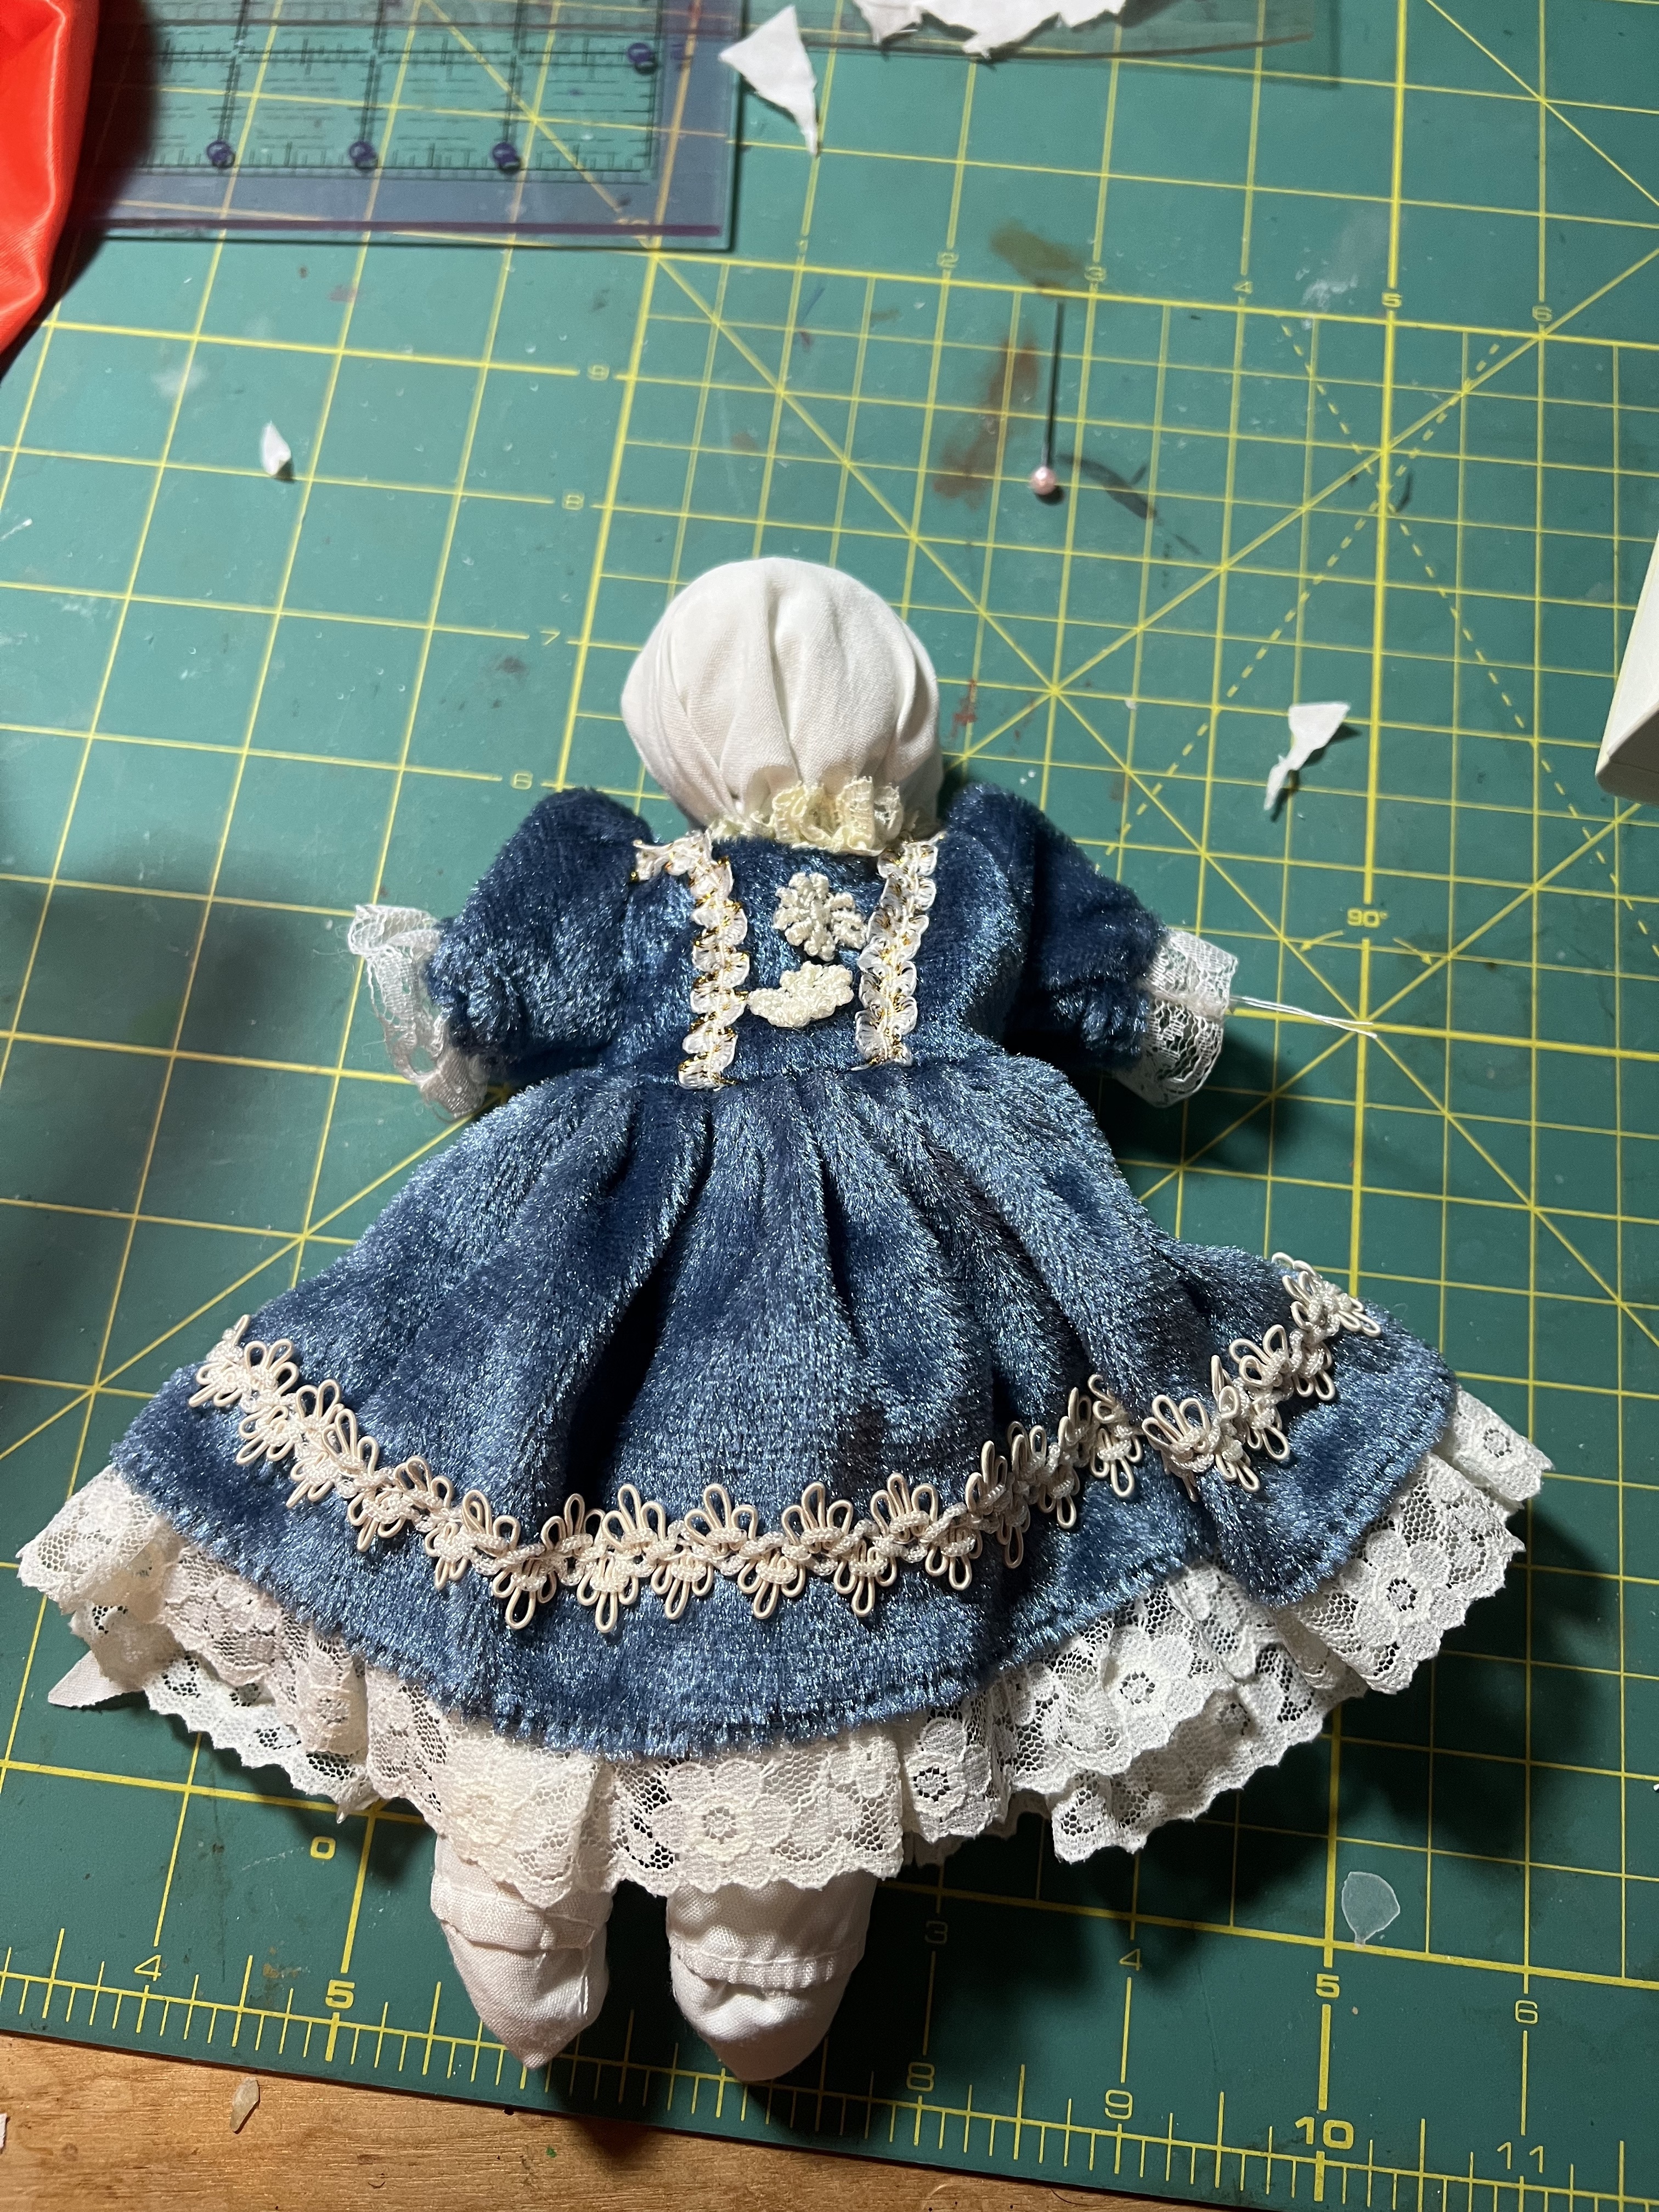
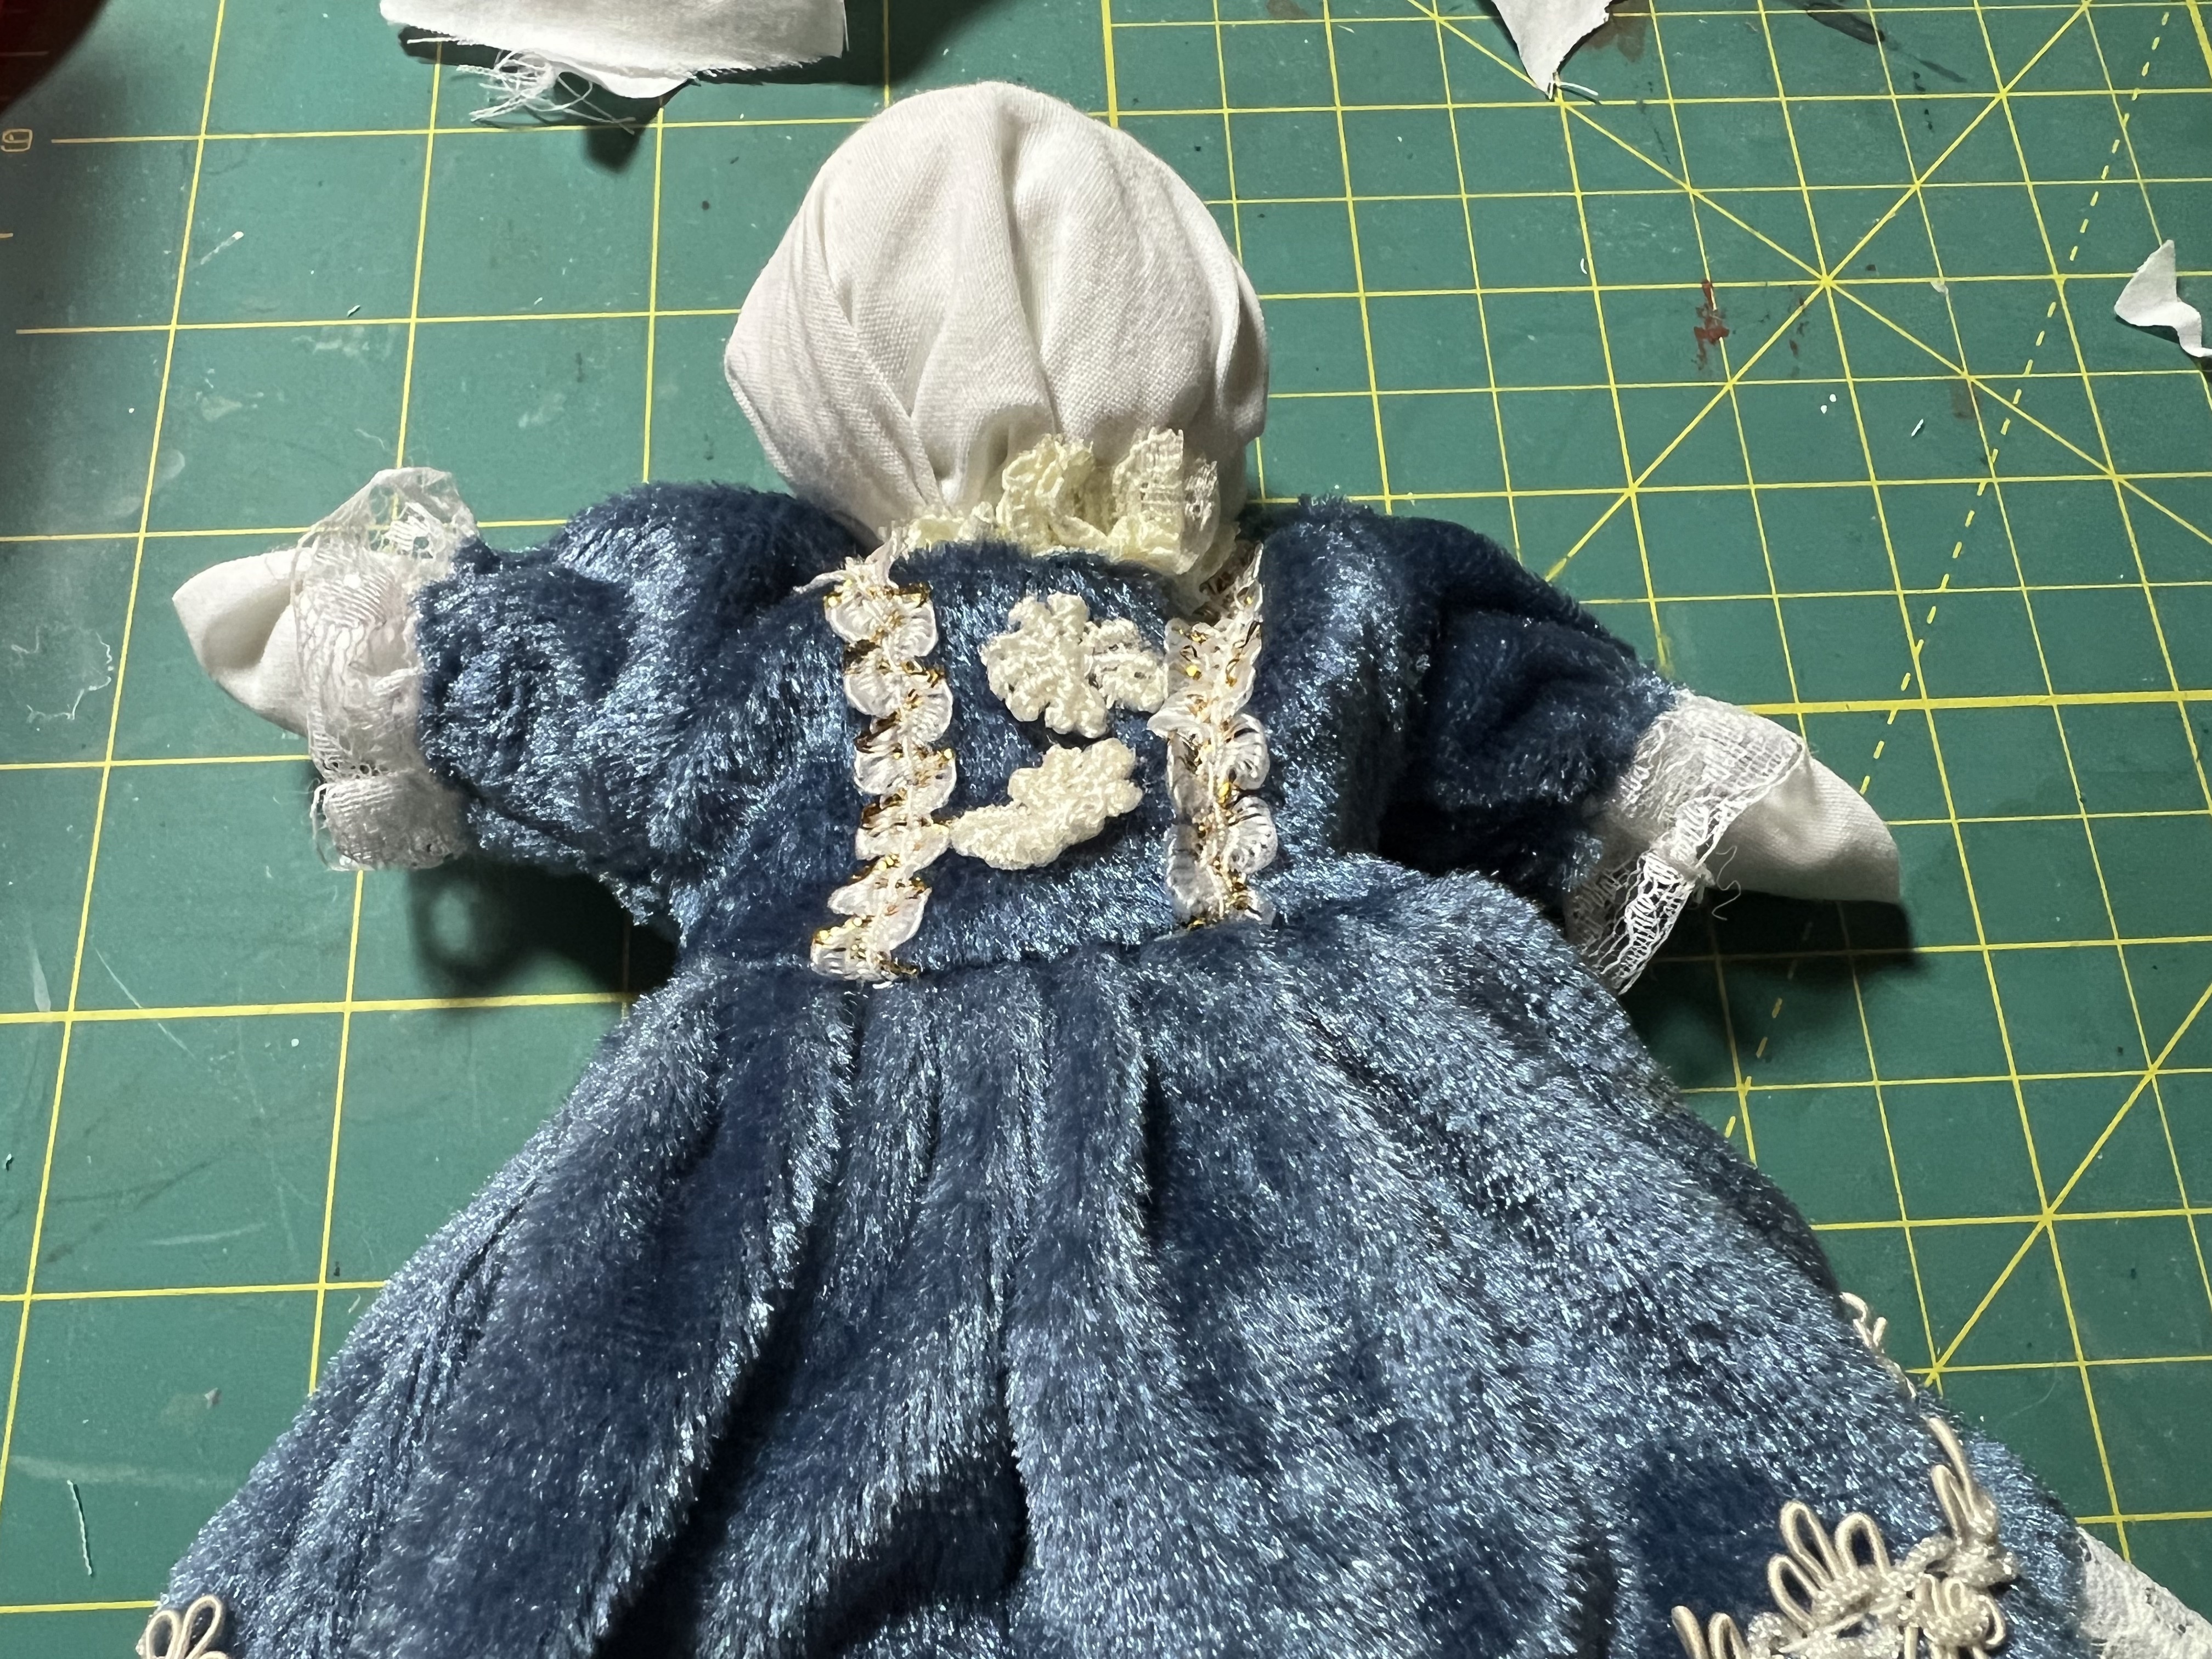
I sewed her a little tube torso from scraps, then stuffed the bloomers and stitched them onto the torso at the waist. I stuck this inside the dress, pulling just the top edge of it through the neck hole. Then I gathered more of the white scrap into a ball and sewed it onto that top edge pf the body to form the head. I stuffed more scrap into the sleeves and attached them at the cuffs to make hands.

For the face, I'm planning on button eyes, an embroidered mouth, and big thick yarn for hair. Getting the eyes on was as far as I got tonight, so I'll do the rest tomorrow. I'm liking how she's turning out.


breakinglight11: (Default)

I was very happy when Sam LeVangie, a friend and frequent theater collaborator, was going to be playing in my new larp Brockhurst. When I cast her as one of the fancy ladies, I thought it might be nice to help her with a costume. I've been wanting to drive my hand at a 1910s look for a while now. Most of my current collection fits people close to my size, so Sam, though significantly taller than me, is a good candidate.

I had this purple prom dress, which I've only worn out once, while playing Folding the River if I remember correctly. I tried it on Sam as a possibility for her princess character in The Prince Comes of Age, but didn't quite work then. Still, I remembered it was a good shape and color for her, so I decided adapt it to a 1910s dress for her.

I bought a lacy blouse from the thrift store and cut it up. It had enormous flutter sleeves, which made it ideal. A high waist with mesh sleeves and bodice detailing is characteristic of the dresses of the period, so I think it works.

It's not quite finished. I haven't sewn the stomach piece on yet, and I want to finish the raw edges of that piece with this thin dark red ribbon I have. But I like the effect. It's a nice combination of colors-- purple, pink, red, beige --and it evokes the period even if it's not literally historical. I think it will look nice on her, and work well for the role.

breakinglight11: (Default)

Next month, the Watch City Players' current show, GHOSTSHOW, is going to be going up, March 8th at 8PM at the Democracy Center. You may recall it is a collection of ghost-themed short plays, some serious, some very silly and funny. It's free, fun, and short, so you should definitely come see it!

One of those most excellent pieces is "Unimportant Conversations with Ghosts, Part 1," by Lenny Somervell. It's a funny and witty piece between Aaron Burr and Alexander Hamilton-- AFTER the latter was killed in a duel by the former. In order to costume Frances for this, who will be playing the late Hamilton, Lenny found a trench coat in the thrift store and I agreed to alter it to make it look like a period cutaway coat. It still needs a fair bit of work, but it's coming along splendidly!

I put it on Adelaide, my accommodating sewing dummy. Then I used a pencil to trace the shape of the cutaway, such that it stopped just above Adelaide's waist. Then I cut it, high across the stomach and back to the side seams. A fair bit of the floral inner lining was exposed by this, so I cut that out too. Then I folded and pressed over the edges of the cut to finish them and sewed them in place.

Quite cool, eh? It needs to be dyed, have the belt removed, and have the back shaped into tails, but I'm quite happy with its progress. You'll be able to see the finished product in action if you come out to see GHOSTSHOW. 8pm on Saturday, March 8th, at the Democracy Center in Cambridge!

breakinglight11: (Default)

So I sketched another attempt at a designed blouse. This is a case where the shape of the garment is fairly conventional, but it's the piecing together of the textile choices that is supposed to make it unique.


To reprint my notes on the design:

Materials:
- navy, purple, and white plaid shirting
- solid navy shirting

A fitted button-up blouse with a mandarin collar and cap sleeves, no cuffs. It is pieced together in quarters. The front right and back left quarters are done in the plaid on the straight grain. The front left quarter and the left sleeve are done in the plaid on the bias. The back right and right sleeve are in the solid navy. The mandarin collar is three-quarters straight-grain plaid with the right front quarter of the solid navy. The hem has a short version of traditional shirttails. I originally thought maybe there should be narrow side panels of the solid, but I think maybe they're not necessary with this quartering. The buttons can be navy or a contrast, maybe as pop of a new color.

I actually really like this, and I think it's something I would actually wear. It's probably not too far outside my capacity to sew, either. I could probably find a pattern that was close to this and alter it to suit my needs. I just wonder if I could find a plaid like I imagine, in navy, white, and purple, and then a solid in a matching navy. That might be the most challenging part.

breakinglight11: (Default)


The costuming aesthetic for the show I'm working on, Brecht's Caucasian Chalk Circle, is a combination of deconstructed post-apocalyptic with the traditional garb of the Caucus region. Recently the head costumer gave me the arms of a leather jacket she cut up to make something else and said I could mess around and try to make something with them if I liked. I knew she'd used most of the jacket to make armor for the chest to be worn by some soldier characters. So I decided to see if I could make something to be worn on the legs.


First I cut open the sleeves so that the leather lay flat. Looking at them laid out this way, it struck me that I could make something along the lines of chaps, which are basically detachable pant legs that are held together with a belt that serve as horseback or motorcycle riding gear. I also dug out an old, falling-apart leather belt I had in my stash.

Since they would likely be worn by a man if used, I decided to use Bernie as my model. He held the belt around his waist while I positioned the leather pieces where I wanted them to hit on the legs. I decided I wanted them fairly far to the front, but not so far that they looked like pants that just didn't have a crotch. Initially I thought I might use them with the cuff side down, as you can see here as worn by Adelaide, who is of more delicate proportions than Bernie.


I wasn't sure how to style them, except that I knew I wanted them to look pieced together, as if made out of layers or "plates" even though they were leather. Bernie found this image on the Internet which proved to clarify my thoughts, and I decided to model mine after it.


I cut each leather sleeve along the other side seam so I could remove the piece designed to hold the elbow; it didn't lay flat and looked bulgy. But otherwise I didn't want to wreck the leather in case I didn't like what I tried. So I folded it over onto itself in three places, held down with alligator clamps, to make it look like pieces of leather laid on top of itself. When I arranged that to my satisfaction on both legs, I ran a little line of hot glue instead the creases to keep them in place. Then I sewed them down on my sewing machine, which I was pleased to find handled sewing through all the layers of leather with minimal trouble. I ended up flipping the pieces so that the cuffs were at the top attached to the belt, as I liked them tapering down the leg better than up it. Finally I took my scissors to it to make it a little less squared off at the places where one "piece" supposedly joined the one above it. Here is Adelaide in the current finished product.


Kinda cool, huh? The belt still needs a buckle, it's held on with another surprisingly useful alligator clip. And they might be most wearable with some kind of buckle holding the chaps down onto the legs. But I think those would be best designed once the wearer has been determined so that any such attachments can be sized correctly. But I'm pretty happy with them. They look appropriate for a post-apocalyptic setting, I think, and have an interesting suggestion of a beetle carapace. I will show them to the costumer today and see what she thinks.

breakinglight11: (Bowing Fool)
Today, when a work meeting was unexpectedly canceled, I decided to go ahead and dye the Twenties dress. The color I selected was aquamarine; for some reason that seemed right to me, though I wished I'd been struck by a color less similar to the only other dye job I did. It went easier this time than the first time I attempted a dye project, as this dress was light enough that I could stir it around with a broom handle instead of having to use my hands. I watched it swirl around in the blue for thirty minutes like a fish. and I could tell right away that this was going to come out differently.

twentiesdress8

In the exact opposite of the Mary gown, the lace barely took any color at all, while the polyester underlayer turned out much more vibrant. I could see it even as I swished it around. But again, the different materials all turn out a little differently. The bib, made of a cottony material, is more of a baby blue than I expected, and surprisingly so is the sash, which is something satiny. The underlayer, which [livejournal.com profile] polaris_xx observed was somewhat yellowed with age, is the most "acquamarine" of any of it, likely mixing with the blue. It's not what I expected, but I think I like it, particularly the pale lace over the aqua body of the dress.

twentiesdress7

Again, sorry for the blue dress in the blue room. But all I need now is a complimentary cloche hat, eh?

twentiesdress6
breakinglight11: (Cavalier Fool)
So what I ended up doing is drawing a line along the pins to take in the sides, then sewed along those lines on my machine. It was a bit tough to get on, as the waist is much narrower than my hips, but look at it. The fit is way better now!

twentiesdress4 twentiesdress5

Not perfect, it's a bit loose over the lower belly, but certainly a lot better, as compared to the last picture. Pardon my dark underwear showing through, I just threw it on to show it to you. A twenties-styled dress is supposed to be very straight up and down, and I took the waist in just a bit more than that, but it mostly hits the silhouette.

Now that these are done, I can finish the armcyes. Then I can dye it. I'm really excited to see the finished product, so maybe I'll dive right in and move on!
breakinglight11: (painting)
I had such fun altering the Atonement dress for Carolyn that I thought I'd take on another alteration project. This time I found a dress in the thrift store that I thought had potential to be altered into a look for the Roaring Twenties!

twentiesdress1

As it is, it is an tube. Unflattering, completely unstylish. But the drop waist and the bib collar make me think it has potential. I already cut off the hideous sleeves and removed the ginormous shoulder pads. But as you can see, it needs more work. It is way too wide one me, lacking the sleekness that was part of that twenties style. Looks like I'll finally get the chance to take something in at the sides! But it has a lace overlay, which makes things tough. Probably the proper way to do it would be to undo the side seams and take them in separate and rejoin them. But I don't want to do that.

Instead, I flipped the dress inside out and put it on Adelaide, my dress form. The I took pins and pinned it down her sides from the bottom of the armcye to down to the sash around the drop waist. I took care to keep it smooth, pinning it and repinning it three times until it was right. The new long dressmaking pins I bought were great, they are so luxurious to use! As per usual, I pinned it as closely to Addie as I could, because something a little too tight on her should be just right on me.

twentiesdress2 twentiesdress3

I haven't tried to take it off her yet, because I'm a bit nervous that getting something this tight off will shake the pins loose. I might draw a line on it to follow on my sewing machine to make a new side seam, or I might put in a basting stitch by hand. I haven't decided yet.

I am certain, however, that I am going to dye this dress once I've altered it to my satisfaction. No self-respecting Roaring Twenties dress would ever be white. I had such nice success dyeing a lace dress with the Mary Stone ball gown I'd love to do it again. I bought a bottle of aquamarine dye at Jo-Ann Fabrics; for some reason aquamarine seemed right.

I may even have a use for this dress in the near future. I won't say anything about it until I'm certain, but that would be a nice confluence of events.
breakinglight11: (painting)
I am feverishly working away on finishing my thesis, as the due date looms. I actually don't hate what I have now, and hopefully it will turn out okay to hand in. But to keep my brain from glazing over, I took occasional breaks from writing to finish up the alterations on the knockoff Atonement dress.

Based on some research and the suggestions of my more knowledgeable friends, it seemed like a rolled hem was the right technique to use when taking up the dress. For most of it I just folded it up, sewed it down, and cut away the excess material. I did the same thing to raise the hem of the inner lining. But for finishing up the newly shortened sash coming down from the hip swag, I dug out my rolled hem sewing machine foot and tried it for the first time. It was a lot harder than I thought it would be and I need more practice, but it came out neat enough. That was the last detail that needed fixing up. Today I got the chance to try it on [livejournal.com profile] niobien and I was pleased to see it came out fitting very nicely!

greendressaltering6

It fits in the bodice, the trunk, and the front, and the hem worked out well. It hangs straight and is the right length that she could wear it with either flats or heels. It transitions smoothly from the even front to the train in the back. She can walk, sit, and stand comfortably in it, and the zipper goes up smoothly. She is both comfortable as well as lovely in it. I am really happy to have done a good job on it, and I'm really happy that Carolyn likes it. :-) 
breakinglight11: (painting)
As I posted about a few weeks ago, I have been altering that knockoff Atonement dress I have to fit the lovely [livejournal.com profile] niobien. I already did the work required to make the bodice fit, shortening the straps and lowering the top of the zipper. The other part that needed alteration was the hem. It clearly needed to be taken up so as not to be trod on when worn, but this dress has a long train in the back. I was a bit stumped about how to properly take up something that isn't supposed to be the same length all the way around. I pinned up the front while Carolyn was wearing it to match it to her height, but I just left the train in the back the way it was and decided I'd think about that part later.

Yesterday [livejournal.com profile] nennivian, [livejournal.com profile] morethings5 and I had a little bit of a sewing party at my house, all working on various projects. I pulled out the dress and solicited some opinions. Jonathan suggested making sure it was taken up the same amount all the way around, while Charlotte said it could probably be transitioned from the new length into the train. I ended up combining these two. I measured the distance from the waist seam to the new length, and determined it was taken up by four and a half inches. So to keep it even, I took up the hem by four and a half inches all the way across the front. Then, once I had the front all even, I just carefully folded a smooth transition from that into the train. Today I pressed the crease of the new hem so that it would be sharp and flat, then I laid the dress out as flat as possible to check if it was even and balanced.

greendressaltering5

Not too bad, huh? That darker fabric crumpled up in the center is the lining. I will figure out what to do with it after I finish the real hem.

My plan was to sew in a blind hem by hand. A blind hem is when you keep the stitching holding the hem up invisible by only putting the needle through a few threads of the fabric rather than punching all the way through to the outside. I knew it would be a lot of work on a hem this long, but it was the proper way, and it can't be done truly invisibly by machine. But when I tried it, I found the fabric would not allow me to pick up any of its fibers just on the back, even the slight picking with the needle pierced it all the way through. So much for the blind hem then! I had no choice but to choose a method where the stitches would show.

The way the original hem was finished was just a tiny bit of a fold over with a line of straight stitches very, very close to the edge. I decided I would do the same. I loaded my machine with a green thread my mom's had in her sewing stuff forever which just happened to match the dress perfectly and ran a line of stitching all the way around the new edge, then pressed it. It came out neat and seems serviceable, except there is so much material tucked up behind it that it's flopping down. If I'd been able to do the blind hem I wouldn't have had to worry about it, as I could have put the seam up high enough to hold that extra up, but I didn't want a visible line of stitching four and a half inches up the skirt. I'm not sure what the best way to deal with it is, though I guess I will probably have to cut it off. As I recall when I opened up the back of it, the material is a bit ravelly, though not too bad. I'm slightly resistant to that as it may make it a bit ugly on the inside, but I guess it doesn't matter too much. For that matter, if I just wanted to hack the inner lining up to the right length, it will be concealed as well, which would save me some labor.

I can't wait to try it on Carolyn again, I'd love to see how it looks!
breakinglight11: (Bowing Fool)
You may recall the knockoff Atonement dress that I bought myself for my birthday last year. As I recall, the eBay listing from which I got it said it was a commission that they were now reselling, so I think it was a custom fit. That original owner was petite but even less curvy than I am, and remarkably short-waisted, so I was never quite happy with the fit. I considered altering it, but the biggest problem for me seemed to unfixable, as the slightly-two-narrow hips liked to ride up on me and make the front all crinkly. Still, the dress has interesting bones, so I hated to just donate it or something.

It occurred to me then that I could work it to fit somebody else. That would give me practice altering fit, as well as make a nice present for somebody I like. I immediately thought of Carolyn, my favorite model, who is also more petite than me and might not have the same hip issue as I did, nor the problem with the zipper and the broad rib cage. I've been meaning to practice taking things in at the side anyway. So I asked her is she was interested, and she kindly obliged.

When she tried the dress on, shockingly it turned out to be a bit of a tight fit. She too is longer-waisted than the dress is designed for, and despite her much greater delicacy in the trunk than me, the zipper just barely closed and make it pretty tough for her to breathe. It didn't need taking in on the sides at all. But still, it looked pretty damn good on her, better than it ever looked on me, and could work if tweaked in some other ways. It was too long, and it definitely needed the straps shortened. It also occurred to me, because I never could get the damn thing zipped, to slide the zipper down a couple of inches. Carolyn said it was much more comfortable that way, and it fixed the creasing problem in the front. Now that is something I can work with!

So here's what I did. I opened up the top seams on the back of the dress. It's really sturdily and cleanly made, with a complete lining of another layer of the fashion fabric. You can see where the two layers are seamed together here.

greendressaltering1

I took my seam ripper and picked the two layers apart. I also removed the straps while I was in there, to resew them in place a good bit shorter than they were before. I also detached the zipper from the lining-- but not the outer fashion fabric, you'll notice. You can also see the slightly spongy interfacing they used to pad the bodice here.

greendressaltering2

Then I folded each of the two layers of dress material inward, along a straight line going from just inside where the strap attached and the point to which I had pulled the zipper down. That spot would be the new top of the zipper. I noticed that the way it was designed, the zipper had no stopper, the track just disappeared into the seam between the two fabric layers, so I decided to do the same thing. I folded in the zipper above that point in between just the same way. The I sewed the folded over parts of the two layers together, so that the stitches would not show on the outside.

greendressaltering3

I did the same thing on the other side. Here's the current state of the dress's back, finished and pressed.

greendressaltering4

It's not perfect, I could not make the new seams quite as clean as the old ones, but no switches show, and the fabric stayed smooth and everything is still symmetrical. I also managed to make the zipper disappear into the seams such that it now terminates at a lower point! I can't wait to try it on Carolyn again. I think it will work much better.

I still have to hem it, and figure out how a shortened hem is going to interact with the giant train it's got. But one thing at a time, and I think I pulled off the first stage nicely.
breakinglight11: (painting)
I recently took a class at the Boston Vintage Factory where I made a kimono robe.


kimonorobe1

I picked this gold fabric with a silky side and a striated side to get experience working with slippery fabrics. It was a lot of work, but the studio's owner and teacher Kristen walked me through it, and I picked up some really great skills. It's all finished with French seams, which look neat and professional, and I even set in sleeves for the first time.

kimonorobe2

In places I did a very neat job, such as the topstitching in here on the collar.


kimonorobe3


Other places, like on the back of the neck here, didn't come out so perfectly. But I am pleased with how I managed to get the collar to lay against the fabric of the back. It can be difficult to get a curve like the collar piece to lay smoothly, but I attached it with minimal puckering.

kimonorobe4


Here's the inside of the sleeve. It's hard to see, but I managed to set it in such that the seams all meet in more or less the same place under the arm. Still, the fabric of the sleeve is a little pinched up right there, rather than entirely smooth. You can also see the French seams and the inner tie.

It's not perfect, but I'm pretty proud of myself, I'm so excited that my skills are building. And I can't recommend Kristen's classes enough. You should totally go to the BVF website and sign up for one. :-)
breakinglight11: (Easy Fool)
I had the first session of the new sewing class I'm taking at The Boston Vintage Factory this Tuesday, and it went well. This class is about making a kimono robe out of silk satin, and practicing the skills of working with difficult, unforgiving fabrics, setting in sleeves, and making French seams. I've not done much of any of those, and I'm excited to get the chance to learn them.

kimonorobeclass

Speaking of robes, I've been thinking about another possible sewing project along those lines. I really loved the patchwork housecoat that Bilbo wore in The Hobbit movie. It looked homey, comfortable, and luxurious all at the same time, and I think replicating it might be a fun project. Not sure it's something I'd ever wear myself, but [livejournal.com profile] laurion suggested it might serve as a bathrobe, and I suppose I could always just give it to somebody if I decided I didn't want it. I don't know much about quilting, which I would have to figure out if I were to undertake such a thing. I have lots of neat fabric scraps that I could make it out of, but I'd have to figure out if they're the right material for the project. I'll have to do some research.

bilbopatchworkrobe

Finally, while searching for a couple of props in a thrift store for a photo shoot I have in mind, I found an interesting dress. It's a fabulously eighties-tastic dress made of forest green stretch velvet and iridescent poly satin. I think it's ridiculously cheesy for a formal dress, but the details about it make me think it has potential as a period costume.

greeneightiesdress1

Look at those shoulders, and the silk flowers. Silly in a modern context, but something about it reminds me of a Victorian ball gown, maybe Civil War if you stretch. The bodice is close-fitting, with a full skirt beneath it. Not quite full enough for Victorian, and it only goes down to about tea-length, but I could add another layer of skirt beneath it, maybe gather it up like bunting, to embellish it. Here's a closer look at the bodice.

greeneightiesdress2

Potential, right? There's probably other ways I could dress it up too to make it look more period. I think it could be a fun project to turn it into a useable costume. It might come in handy for my photoshoot idea, depending on who it fits, or just for me to use for larping or something.
breakinglight11: (Default)
Today I wore the pencil skirt I made in the Pin-up Pencil Skirt class I took at the Boston Vintage Factory.

tweedskirt1

This isn't a very good picture, but it is a slightly below the knee skirt made out of wool tweed. I got to practice a lot of techniques under my teacher Kristen's supervision, including darts, making a waistband, fitting, and even finishing seams with a serger. I've always wanted to use a serger, this was the first time I'd ever gotten a chance to, and it was a lot of fun and worked out really nicely. These are the first finished seams I've ever made. The fabric is really neat, it's black and white fibers with a slimmer thread of gold woven in through. Here's a closer look at it.

tweedskirt2

It's probably the slickest, neatest, most "professional" garments I've ever made. This class was just what I needed, with a knowledgeable teacher to walk me through the right process and catch my stupid mistakes so I'd have a clearer idea of how to do things in the future. The fit is pretty good, too, although not the most practical garment for me. In order to get the right look, it needed to be tapered at the bottom, which looks cool, but is suited to someone who takes dainty, ladylike steps. It's a little restrictive for someone with my particular striding gait. I should probably also raise the hemline a little bit; above-the-knee tends to look better on a person of my size, and it might give me a little more room for my long strides. But I'm really happy with the sewing job I did on it.

I signed up for another class, a Christmas gift from my parents. That is the Kimono Robe and Slippers class, which will work on more advanced techniques such as setting in sleeves (which I have no experience with at all) and working with slippery fabrics. I'm really excited to be learning more, and I'm really happy to have these opportunities to make progress.
breakinglight11: (CT photoshoot 1)

At last, at last, I have come to a point where I currently have no pressing obligations. And at this point of momentary rest, I thought I'd go over the status of things going on in my life.

As of yesterday, my NYC production of Work-Life Balance is completed. We did a good job, we had a pretty full audience, and we got home safe and sound. I’m really proud of us, and grateful to everyone who helped.

I handed in my graphic novel Lame Swans on Friday. It is nominally finished, but because I ran out of time I didn’t get a chance to edit the images as carefully as I wanted to, so I will likely wait to debut it on my blog or elsewhere until I can remedy that. But I am pretty happy with how it came out, and my teacher said I did a good job.

That means I am done with school until the next residency, which does not start until January 5th. So I have a blessed respite, albeit a shorter one than I expected to. And part of that will be going home for Christmas, yay! I am looking forward to being home and not having anything to worry about except maybe eating too much pie.

The auditions held by Jessica Rose Fielding, the director for The Late Mrs. Chadwick, is happening today in New York. Here's hoping things go nicely, and she finds actors she likes!

Sadly, there will be no ballet classes again until the new year. I am sorry to go without so long, but I'm going to try to practice on my own. Also, I will be going to see The Nutcracker at the Boston Ballet this Wednesday, which I'm really psyched about. God, I love high ballet, and I'm a softy for the music.

I have my last sewing class for the Pin-Up Pencil skirt at The Boston Vintage Factory. I have enjoyed it very much and feel like I learned a lot, and I'm probably going to sign up for another class soon.

I'm also going to start taking care of myself again. Eating better, going to sleep on time, and making sure I get enough exercise. Particularly if I won't have ballet class for a couple of weeks.

I also have a few chore-like things to handle, but they are small things. So I plan enjoying myself for a little while, as in, laying around like a giant lump, before I tackle anything big again.

breakinglight11: (Bowing Fool)
I have been mostly absent from this blog for the last week, which I hate doing, but I was so busy getting ready for this past weekend that I had no time. This past weekend was our trip to New York City to put on our production of Work-Life Balance, my original superhero ten-minute play!

It was a great trip. Our merry band consisted of myself, my tireless co-director/producer Steph, and our stars, Charlotte as Wondra and Jared as Bantam. We left Friday evening and drove to Long Island, where Steph's lovely family gracious allowed us to stay with them for our trip. The Karols were incredibly kind and supportive, excited to see the show, cheering us on, and making breakfast for us both days. We were incredibly lucky that they were willing to help us out that way.

Steph squired us all over the city, finding us tasty restaurants and keeping us on a good schedule. We'd never have been able to navigate so efficiently without her. She even took me to see Mood, the giant designer fabric store, when I realized we were in the Fashion District. That was really exciting, and that place is fabulous. You have to take an old-fashioned elevator to get there, and it has every notion and fabric you could possibly imagine. I'm so glad I got a chance to see it.

The show itself went very well. The theater itself was a small hole-in-the-wall sort of place, but near to Times Square and just up the street from the Spider-Man musical. We had full or nearly full audiences both times, and Bernie and Kindness were wonderful enough to make the trip all the way from Massachusetts to come see it. I'm so grateful that they went to the trouble. Jared and Charlotte did a great job, committing to the roles, carrying the humor, and even looking pretty damn cool in their costumes. I wish I'd remembered to take pictures. We stood up well against the other pieces, some of which were good, some less so. We certainly didn't do too badly for our New York debut.

I'm so glad we did it. Here's to hoping this is the first of many such productions, with great collaborators like these.
breakinglight11: (CT photoshoot 1)
bostonvintagefactory

I should have posted about this ages ago when I first signed up, but I recently got going taking a class at the Boston Vintage Factory, which describes itself as "a D.I.Y. studio dedicated to keeping alive vintage fashion design and techniques (particularly between the 1930′s to late 50′s) as well as retro-inspired lifestyle subjects such as hair and make-up, art and dance." It's called the Pin-Up Pencil Skirt, designed for absolute beginners or those who want to brush up on their basic skills while going through the steps of making a pencil skirt. The first session was last week, and I thoroughly enjoyed it. This is exactly the sort of thing I've been looking for, expert instruction to guide me through developing my sewing skills. I know some things, but it's extremely helpful to have someone knowledgeable to show me technique and point out my dumb mistakes. I think this is really going to help me with projects in the future, especially given the trouble I've had interpreting patterns in the past. You show check out the website and see if anything interests you; besides sewing there are classes on makeup, yoga, burlesque, and more. I've got the second session today. Kristin is a really good teacher, so I'm looking forward to it.

Patch job

Oct. 5th, 2012 09:40 am
breakinglight11: (CT photoshoot 1)
So due to my being a bit heavier than I had been, I've been relying on a few pairs of jeans again and again. I don't wear jeans as often as I used to because of the need for professional dress, and if things go my way my new exercise schedule will have me slim down a bit, so I am really loath to just replace them, but it means those three or so pairs are getting a lot of wear. And the reason they fit now is because they're already a little stretched out from years of use. So recently one of my currently fitting pairs got a rather embarrassing hole in the seat that rendered them unwearable.

I wanted not to lose a pair that fits until I lose a bit of weight, so I decided I would attempt to salvage them. That meant they'd need a patch. I've never mended anything beyond a raveling seam or lost button before, but I didn't think it would be hard. I just had to figure out what to go for with them. In my sewing box I had a couple of denim patches, so I could just attempt to make the hole as invisible as possible, but as if often the case, none of the denim quite matches the color of the pants. The other way I could go is totally the opposite and make the patches very obvious; as is often my way when trying to make my low-budget theater look good, by making the choice seem deliberate, they seem like a design element. I figure I only need to wear them in casual situations anyway, so I wouldn't need to worry about making them déclassé. Hell, they're already years-old ripped jeans. So I decided to give the deliberately-contrasting-patch a try.

In my fabric basket I had some scraps left over from my plaid preppy skirt project. I really like this beige and burdungy color scheme, the linen-like woven cotton seemed appropriately sturdy. So I doubled over the material to give it strength and made a couple of patches. The rip in the butt was of course the important one to fix, and I was able to sufficiently scrunch up the material to sew it on with my machine. Here's how it looks on me, in an oh-so-classy shot of my ass.

patchjeans1

What do we think? Does it look okay, or does it look like I put a big stupid thing on my butt? I'm not sure if I like it or think it looks silly-- or possibly both, I might like it but ALSO think it looks too silly to wear. Opinions?

There was also a rip in the knee, so in order to up the "deliberateness" factor I put another patch over it. That one had to go on by hand, as I couldn't get the pant leg to fit over the arm of my sewing machine. What do you think-- does it help, or does it just look like another dumb applique? I'm also considering putting on one more patch even though there are no more rips, like on the opposite thigh or something, to make it look more like they're supposed to be there. Is that a dumb idea?

patchjeans2

So I'm not sure these jeans are still wearable anywhere besides around the house. But I guess it was a low-risk proposition, as it's not like they could have been ruined much more than they already were. Also, here's a random picture taken by accident when I was trying to adjust the automatic camera on my phone that turned out kind of cool.

patchjeans3
breakinglight11: (Default)
Yesterday I attended the fascinator workshop I signed up to take at the Boston Vintage Factory!

I had a lot of fun, and found Kristen to be knowledgeable and very engaging to learn from. She went into some of the history of the style, as well as the techniques and materials. I feel like I learned a lot about the craft of it, and I really enjoyed experimenting with actually making a fascinator. Here it is on my (unfortunately headless) dress form Adelaide.

fascinator1

There were so many cool milinery trims that I wanted to use all of them! But I particularly liked this sprig of red berries and so built things around that. But I was sorely tempted by the feathers and tiny little bird models. I'm not sure what I made is all that excellent an example, in fact it might be kind of tacky, but I like it all the same. Hey, it's a first try!

Here it is on my head.

fascinator2

And here's a shot that came out really badly but I like the angle of it, so I'm posting it anyway.

fascinator3

Profile

breakinglight11: (Default)
breakinglight11

May 2025

S M T W T F S
    123
45678910
11121314151617
18192021222324
25262728293031

Syndicate

RSS Atom

Most Popular Tags

Style Credit

Expand Cut Tags

No cut tags
Page generated Jun. 16th, 2025 01:37 am
Powered by Dreamwidth Studios